User Manual: Keyball59 (Knob)
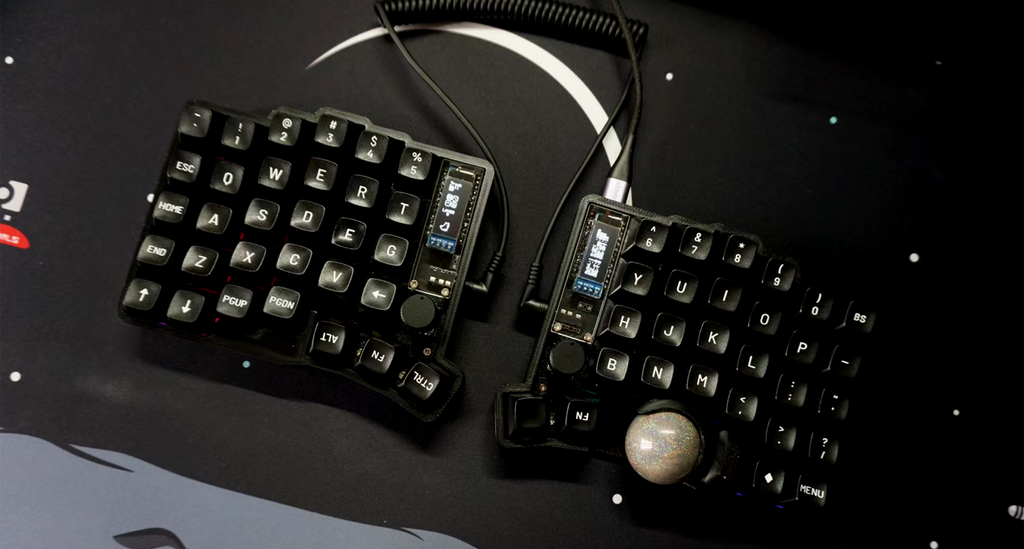
Keyball series is designed by Yowkees. This is for Keyball59 with knob edition.

Keyball59 with MT3 WOB Keycap
How to properly setup / connect your split keyboard

- First, connect the left and right halves of your keyboard using the TRS/TRRS cable. Ensure that the cable is fully inserted but not forced violently.
- Insert a USB-C (or Type-C) cable into the right side of your split keyboard.
- Note that you don’t need to insert a USB-C cable into both sides; only the right side requires it.
- Demo video.
- Never unplug or plug-in the TRS cable while the USB-C connection is still active. You have a 50% chance of bricking the MCU. The slave will always be unable to register keys, and you will need to replace the MCU on the boards.
Key remap

- Use Vial to remap the keys. You can download the software or use web interface to remap the keys. You may refer to Basic Vial Usage and Keymap Idea to explore Vial and keymap. VIAL, not VIA.
- Auto-detected in Vial, supports Win, Linux, and Mac. Real-time key remap software without the needs of code compilation. No load json is required.
- This keyboard has a total of 6 layers only.
Special Keycodes
- DPI+: DPI+200, move cursor faster (max 3400)
- DPI-: DPI-200, move cursor slower (min 400)
- SNP: hold so it goes super slow for precision
- SNPT: toggle so it goes super slow for precision
- SNP+: DPI+100 for SNP (max 500)
- SNP-: DPI-100 for SNP (min 200)
- DRG: hold to scroll
- DRGT: toggle to scroll
- DRG+: DPI+50 for SNP (max 760)
- DRG-: DPI-50 for DRG (min 10)
- ATG: toggle automouse layer
- A50: +50ms timeout for automouse layer
- A50-: -50ms timeout for automouse layer
- A100: +100ms timeout for automouse layer
- ATV: set sensitivity of automouse layer
- T_SAVE: save automouse setting (please save after your configured automouse settings)
- TINFO: toggle oled screen to show trackball status
Special Configuration
- Layer 3: Trackball layer. When you hold Layer 3, the trackball snips, and the cursor moves very slowly.
- Layer 5: Mouse layer. When the automouse layer is activated, touching the trackball will automatically switch to Layer 5. You may remap Mouse 1 and Mouse 2 as left and right clicks for instant mouse control.
- The automouse layer can be deactivated quickly. To extend the timeout, tap A100. A timeout of 600 is recommended.


Troubleshooting
1. I have activated autmouse layer by toggling ATG. The oled shows AutoL:1. But when i move the trackball, i cant use Mouse 1 or 2 that i set in Layer 5.>> Try to extend the timeout of automouse layer to likely 600 by A100.
2. When I am in Layer 3, the cursor moves super slow, why?
>> Layer 3 is the preset snipping layer. In Layer 3 the cursor will move very slow. This is preset and unchangeable.
3. My left oled display is off and i type but cant wake it up.
>> Replug-in the type-c cable should help. Beware to turn off the TInfo after you toggle it on.
4. My slave is not responding! There is oled and RGB light, but I cant type.
>> Your MCU is probably bricked. This might have happened due to accidentally hot-plugging the TRRS cable. Please refer to the guide on How to Properly Set Up/Connect Your Split Keyboard. The solution for a bricked MCU is to replace it with a new one. While the MCU on the Keyball59 is socketed, you will still need to perform some soldering work to complete the replacement.

